Wednesday 20 November 2013

A Winter and Dessert Classic - Blackberry and Apple Crumble with Vanilla Custard


For all of you dessert lovers out there. This one's for you. 

As Gregg from MasterChef would say, this is a great big snog of a pudding. A pudding that gives you a hug. 

He's not wrong. 

Crumble is a winter staple and the combination of blackberries apples and cinnamon couldn't scream Christmas and fires and comfort any more if it tried. 

I made this the other day for a dinner party I was catering but as individual little puddings to make them a bit smarter. Have a glance at them here on my facebook page... 

https://www.facebook.com/photo.php?fbid=615522665171683&set=pb.615041795219770.-2207520000.1384865972.&type=3&theater

However when I was at home and we had an old family friend coming round for supper, I was put in charge of the pudding (and of course ended up cooking everything). I decided to do this again simply so I could show you lot. I've even gone the extra mile and made vanilla custard because quite frankly, if you're going to eat pud, eat it properly. 


You will need: 

Crumble: 
4 Cooking Apples
2 Packs of Blackberries 
Brown Sugar 
Cinnamon 
A drop or 2 of water 

For the topping:
Porridge oats 
Butter
Brown Sugar
Flour 


Custard:
6 Egg Yolks 
250ml Double Cream 
250ml Milk
2 vanilla pods or some vanilla essence 
50g Sugar 

Lets crack on with the crumble shall we? First things first, pour yourself and your sous chef a glass of wine and put on your iPod. 

Next peel all the apples


Core them and chop them into chunks roughly about this sort of size. Pop them into a saucepan. 


Now add a dash of water to them 


Some cinnamon 


Add some brown sugar (I’m sorry there are no measurements, we went by taste)


Now put these onto a low heat to start to stew. If you have to take your eye off them make sure someone is watching. Tilly (the 4 legged one this time) took over this task. 


Soon it will be time to add the blackberries. I’ve got frozen ones here because Mum couldn't find any fresh ones. They work just as well. Pop these on top of your apples and give them a good stir, but gently. You don't want puree! 


When these have cooked down a bit have a taste. Then you can add more sugar or cinnamon as you see fit.


As soon as this is looking pretty cooked. Turn it off and leave it to one side. 


Now it’s on to the topping. Again I have no quantities which greatly annoyed Maddie, whose job it was to crumble. So I just whacked a suitable looking amount of butter and flour into a bowl and told her to start rubbing. 


Rubbing is the act of literally rubbing flour and butter through your finger tips small bits at a time to make a bread crumb consistency. 

Maddie is demonstrating this so very well here. 


When you have said 'breadcrumbs' bulk out the mixture with oats and brown sugar. If you look like you have enough to cover your crumble then you are done! 


Now it’s on to the custard. 

I don’t like custard, at all. This is a whole new story though; it’s like a big puddle of melted vanilla ice cream. I can deal with that. Not that yellow gloop that comes out of a tin and looks like you could start brick laying with it. 

To begin, separate out your eggs yolk from the whites. Don't throw the whites away, keep them. You could make meringues; or if your feeling so inclined to eat something as exciting as cardboard the next day for breakfast, you could make an egg white omelet. It's my professional advice though to not eat egg white omelets. 

Now add the sugar to the egg yolks and whisk.


These need to be whisked so that they change colour and become really pale. 


Look at the colour difference in mine. I would tell you why, but I've forgotten. Sorry. 


Whilst these are whisking get Maddie to fill a saucepan with the milk and cream and scrap out the vanilla pod and add the seeds to the pan. If you are using essence, such as I did here, add it to the egg yolks you are currently whisking. 


Put that pan on the heat and gently bring to a simmer, but DO NOT BOIL.  


Now comes for the tricky bit. Once the liquid is simmering and your eggs are nice and pale, add half the liquid into the eggs and stir quickly. 


Now put that back into the pan with the rest of the milk and cream. Stir continuously.  


The egg will start to cook and thicken, but you have to do this gently or you will end up with lumps of egg. I've used a spatula here as I find its the best thing to get all round in the saucepan. Keep stirring, moving the pan on and off the heat if it gets too hot. 


Once you can pull a finger through the mixture and the line stays then the custard is thick enough. 


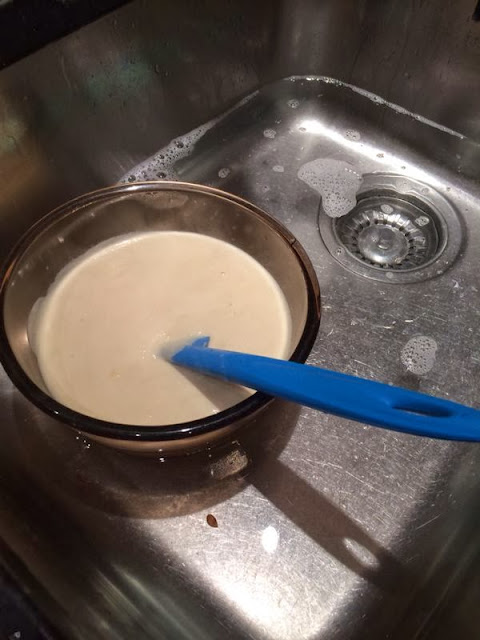
If your not serving it straight away sieve it into another bowl and leave to cool in cold water so it stops cooking. Sieving it means if there are any lumps in your mixture you get rid of them. 


Now going back to your crumble. I always put it in when we sit down for mains. So whack your oven up to high (200degrees C), put the apple and blackberry mix in an appropriate dish and sprinkle a generous layer of crumble on the top. Pop it in the oven and then sit down for dinner!! 


It should be nice and bubbling by the time you take it out. Heat up your custard again, gently!!! 


Spoon out big lovely bowlfuls with piles of custard on top. 

Delicious!! 

Monday 18 November 2013

A Porky Sort of Stroganoff

Im sorry I have not been with you again for a bit but I have been once again packing up my wares and trekking across London.

This is cause for great celebration as I have unpacked all my boxes and thrown them away and I no longer have to root around in a floordrobe for clothes. Its rather marvellous. Never underestimate the power of an actual wardrobe.

Due to the move I headed back to Dorset to collect my kitchen ware. I decided it was high time for a new blog post so I whipped up one of my all time favourites for the rents on Thursday night.

You may or not have noticed a theme in my everyday cooking and this recipe is no different. Its quick, easy and adaptable to ingredients you do or don't have in your fridge. Thats why its a sort of stroganoff, no rules here.

This recipe would feed 4 people easily.

You will need:


 1 Onion
2 cloves of Garlic 
Creme Fraiche (I think this was a 200ml pot and low fat) 
Pork Steaks 
Mushrooms 
Peas
Dijon Mustard
Wholegrain Mustard 
Powered English Mustard

I have used pork steaks as I love them but I've made this with chicken, beef or even left over roast beef. Use what you fancy. You also don't have to include all the mustards, or the peas or mushrooms but do try and get some veg in there. It just makes it a little more interesting. 

So, we begin. Dice your onions and garlic in that clever way I told you in the previous post and chuck then in a deep pan (I use a wok) and start to cook off. 

Another onion trick I forgot to tell you last time was that if you throw some salt in with the onions now, its stops them burning as the salt makes all the water leak out of the onions and helps them to sweat better in the pan.


Next slice your pork into reasonable sized strips and once the onions have softened throw these in the pan too.


Whilst the pork is sealing, slice your mushrooms into slices. Once the pork has sealed scoop everything out of the pan into a ready and waiting bowl.


 Now its the mushrooms turn. I have used 2 different types of mushrooms because thats what we had.


The reason I've suggested removing the pork and onion mix is because you need a chance for the mushrooms to brown and cook off. They contain a lot of water so this gives it a chance to evaporate rather than making everything super soggy. 

Once the mushrooms seem reasonably cooked put the pork and onions back into the pan. 


All the hard work is over now and your on the final stretch. Add the creme fraiche to start your sauce. 


Next the mustards. A big teaspoon of wholegrain and dijon went in to this mix. Usually I add powdered english mustard but as we didn't have any, I couldn't. 


Now you should start to have a decent, tangy sauce. Make sure you season and taste as you go! 

For those that aren't mustard fans I suggest you still keep the wholegrain mustard in it. Its quite a sweet mustard and will round out the whole dish a little more. 


I always serve this with rice so whack on the rice!

Just as you think you're done, throw some frozen peas in and give it a good stir. By now the pork should be cooked so you just need the peas to defrost in the hot sauce. 


We had some leeks in the fridge that needed eating so I sweated these off in some butter to have on the side.

Thats it. All done. So so quick and simple. 


It is certainly not the prettiest looking plate at the party but its a hit every time! 

Let me know what variations you come up with!! 


Tuesday 12 November 2013

Continuing on the Quest of Easy Dinners: Spicy Prawns

I got a text yesterday from a certain little blonde student telling me how she was wrapped up in bed wearing 5 layers, scarf, hat and gloves trying to learn a presentation. As I reclined on my sofa in shorts and a t-shirt in my well heated non student house, I thought about how I did not miss those days at all. She asked me what was coming up next on the blog, so this little post is for her.

This dish has been a staple in our family house for ages and it is one of Dads specialities. It's also the perfect student dish as its crammed full of ginger to help fight those pesky bugs you all pick up and it's filled with chilli. I don't I need to explain the heating effects of chilli.

I use prawns, however, my adventurous little foodie of a brother doesn't eat anything that comes from the sea, so chicken works just as well. Chicken also works well with a student budget before you roll your eyes at me and asked me who eats prawns as a student. (I'm telling you right now I did).

Any who, on to the recipe, this ones a cheeky little number for 2 (just double it up if your feeding more mouths)...

You will need:


(Im starting to realise I'm looking like an ad for Sainsbury's. Other supermarkets are available.) 


2 Lemongrass stalks
2 Garlic cloves
2cm worth of fresh ginger
1 Onion
1 green or red chilli
200ml of chicken stock
1 tbsp of fish sauce
1/2 tbsp of sugar (preferably brown but whatever you have to hand)
1 packet of big prawns

Some veg, once again I had Pak Choi as I love it but cabbage is usually what we plump for.

Sainsbury's are doing a great deal on king prawns at the moment which is why mine are ready cooked but raw prawns are great and frozen prawns are often super cheap and still taste a ok, so grab a bag of them if you so wish.

Start by flattening your lemongrass with a back of the knife, this helps to release all of it's delightful aromas, then chop it up finely.

Peel your ginger, remember to use a teaspoon like I told you, ginger is expensive, you don't want to waste a bit of it! Chop that finely too.

Guess what, peel and chop that garlic finely too.


Now throw all of these in a bowl with your sugar, a tiny pinch of salt (don't go nuts on this as fish sauce is pretty salty anyway) and some black pepper. 


Now add your fish sauce to this delightful little mix. Remember to check what type of opening your bottle has otherwise you may end up throwing it everywhere, that definitely did not happen to me... mmmmm stinky fish.


Now pop your prawns into this and leave to marinade for as long as you can stand. I had an episode of the Vampire Diaries to catch up on and a glass of wine to keep me distracted so I left it for 40 mins. 

When your episode is up, head back to the kitchen to stick on your rice and pop on the kettle for your stock.

Dice your onions and chilli.

Now I'm not sure if everyone knows this trick about onions so I'm going to let you in on a couple of secrets. The reason everyone balls out their eyes when they chop up one of these bad boys is because often, the knife is not as sharp as it could be. This means that the onion cells are often squashed rather than being cut cleanly and this makes you cry like a baby. So people, keep those knives sharp and it will save your mascara. If you do cry, run your finger tips under the cold tap, for some reason I find this stops the tears or helps, don't ask me why.
The second little tip is for helping a good, even dice. Chop you onion in half through the root so that each side is left with the root. Then slice length ways down the onion but not going all the way to the bottom. This way you can cut across the onion whilst the root keeps is all together for you. Voila, takes half the time and your onion chunks are all the same size!


Now put a wok on and start to gently fry your beautifully chopped onion and chilli. When you feel these are soft enough, pour in the stock. 


Bring this to a slow simmer. Now, because my prawns are cooked I put my veg in first but if you were cooking from raw then put the prawns in now, with all the juicy marinade. 


Once these have cooked down a little throw in the prawns and give it a good mix. 


As soon as these are warm your rice should be done and you are good to go. 

Super simple, quick, tasty and warming. 


What more could you want eh Lara? 

I hope you are less cold after you've made this and I'm sorry it doesn't contain soy but you are not really allowed to eat that and I feel my brother and lots of other people might be sad if you died. Take it from me this is a good alternative.  


Friday 8 November 2013

Super Easy Curry But Not Quite Curry

This is kind of a weird recipe, I'm not even sure where I got it from to be honest but it just works. When you serve it up with sticky rice it just because a big gloop of loveliness that you never want to end. Perfect winter warmer some might way.

Its also crazily simple, even more simple than the previous curry. Then again, as the title suggests, I'm not even sure you can call it a curry.

You will need:


(Moji, you'll be please to see there are measurements here, a little birdie told me that you weren't enjoying the freestyle carbonara recipe.)

1 can of coconut milk
2 limes
3 spring onions
1 or 2 green chillies depending on how much you can handle your spice)
A pinch of brown sugar
4 chicken breasts (I guess you could also use prawns if you felt so inclined)
The glass of wine is obligatory for the chef

This makes enough for 3 people with second helpings.

We had frozen chicken in the freezer and no microwave so I just whacked the chicken straight in a hot oven (about 190) and roasted it from frozen. It took about 25 mins.


In the interim dice your spring onion into fairly big chunks and finely sliced the chilli, I kept the seeds because I'm a badass. I only used one chilli but after tasting it I wish I'd gone for 2.


Fry off the onions and chilli in a dribble of sesame oil and then throw in the coconut milk. Bring to a gentle simmer.


Now is a good point to put on the rice. I cheat and use the world's best invention, a rice cooker.


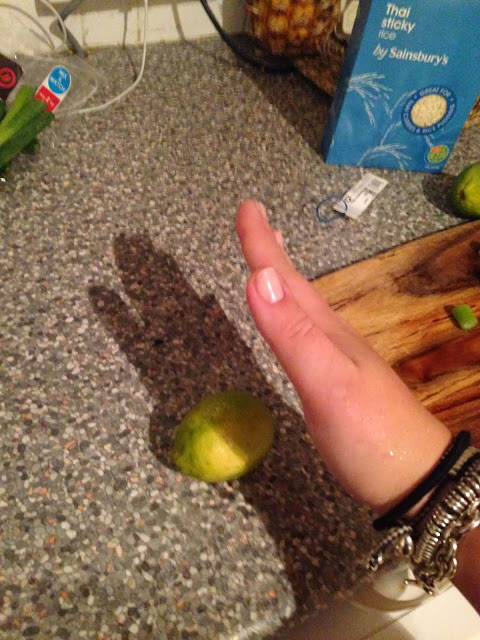
Next juice your 2 limes. A little trick with getting the most out of them is to roll them along the counter under the flat of your palm like so...


This loosens them all up a little and makes the extracting the juice a little easier.


Chuck the juice into the simmer coconut milk and then add a good pinch of sugar.


Now have a little taste. If its too sharp add some more sugar if its fine, then leave it. At this point put the
roasted chicken in.


If you haven't roasted your chicken and its fresh then there is a slight deviation to the recipe.
Slice your chicken into edible sized chunks and then pour the lime juice over it and leave to marinade for at least half an hour.
When the time is up, seal the chicken in the pan first before you start frying the onions and chillies. Once you put in the coconut milk the chicken will poach in it.
Don't throw away the lime marinade and still add it. You need the limey kick. Having done both versions of the recipe I cant really say which one I preferred, so you will not be judged if you leave this stage out.

I'll admit, this does need a little something more with it and my veg weapon of choice is bak choi, I steamed for about 5 mins.


When everything is good and hot, dish it all out.


Voila, an easy dinner done in about 30 mins. Jamie Oliver WHO?